

Hello friends and aspiring erotic artists!
Many of you have recently asked me how I go about creating my comics. A few years back I posted a little article on my BOYTOONS MAGAZINE Blog (the original article in BTM #22 can be seen here) that illustrated that very thing. I thought it would be fun to update and re-post that article here with new hints and tips for those interested in becoming comic book artists. Soooo, I enlisted the help of Zahn and Cauldron in order to put together a little demonstration for you, using a page from Zahn #2!
Before I begin, I want to point out that a lot of artists nowadays draw directly in the computer, and create their art using various tools ans software from start to finish. That’s so cool to me and I hope to give these techniques a shot at some point. Personally, I draw everything by hand, and the colors are all that get done with the computer. I must confess that I’m really interested in learning modern computer techniques since my fellow artists who use them say they are such a time saver. But for now, since it’s all I know, this little demo will discuss my traditional pen to paper process.
STEP #0 – THE SCRIPT:
Obviously, the script is a very good place to start! But it might interest you to know that I don’t always have a script before I put pencil to paper. Sometimes I see a story in my brain, and am just compelled to draw what I’m imagining. 99% of the time those images translate into pencils and I just continue on from there, making the story up as I go. Some characters are okay with that, like Locus for example, and even Cam from time to time… But when I’m working on a book as complex in story as Zahn, I definitely want to map out my ideas so I don’t forget anything or get lost along the way.
My scripts tend to be pretty loose if I am drawing the story myself. If I’m writing for another artist, then I like to “direct” a bit more, and give a general idea of what I’m seeing and how the action should flow and be laid out. However, a good scripter should be willing to let his artist breathe and have the chance to be creative. It is important that the person creating the art have the opportunity to give it their own flavor.
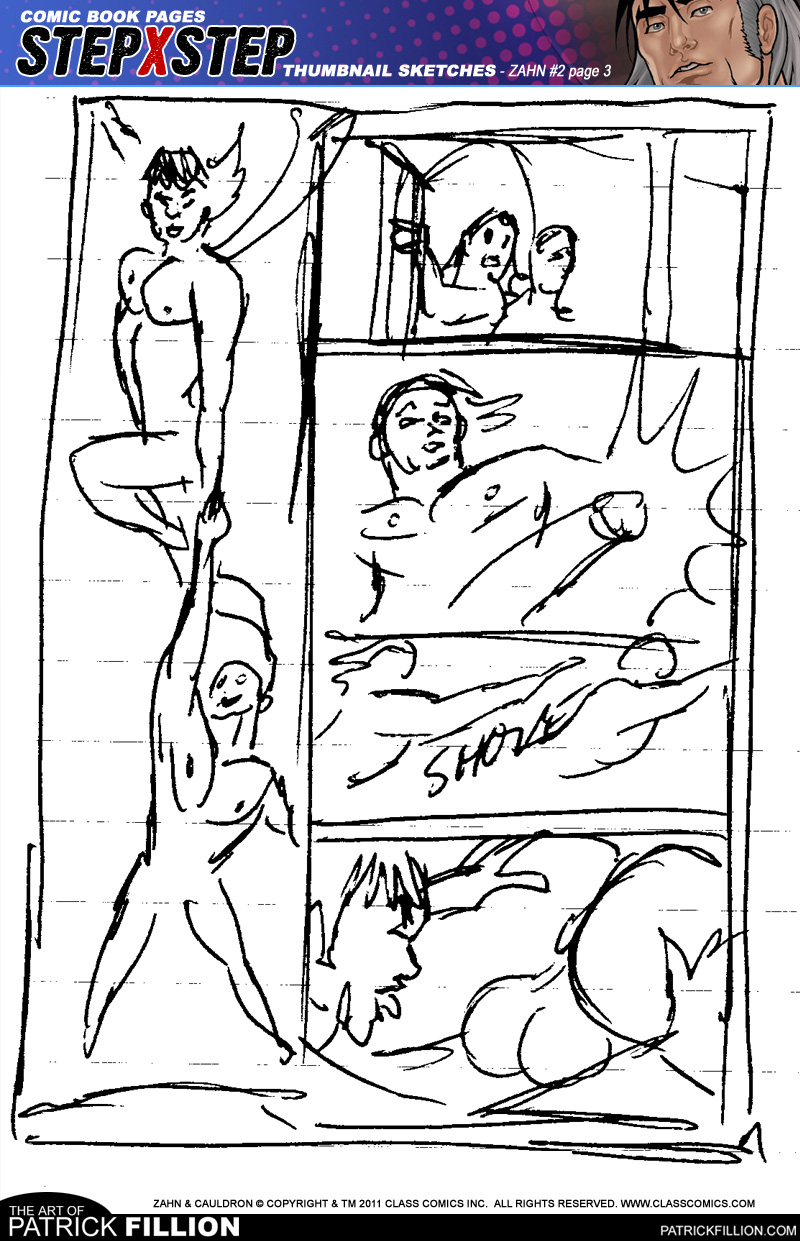
STEP #1 – THE CONCEPT SKETCH:
…also known as “those shitty little thumbnails!” LOL!!! These little guys are never very big. The biggest I ever sketch them is roughly4 x 6 inches. The smallest, as is the case with page 3 from Zahn #2, is roughly 2.5 x 4 inches. They are never very detailed, nor are they even remotely pretty to look at. But they are a road map of sorts to help the artist on his or her way to the pencils.
Again, I don’t always draw these little guys but I have found that these sketches can be very helpful, and are a great place to start an illustration. So much has to go into a single page of sequential art. These sketches help to make sure you haven’t forgotten anything and they help you get a clear understanding of what you want to accomplish.
I don’t always respect the angles or the flow of the action the way I initially sketch it out. Once I start on pencils, I sometimes realize that things work better when done somewhat differently. It really all depends on the mood I’m in, and the story I’m working on.
When I script for other artists, I’ll occasionally provide concept sketches, so that they may get a better idea of what I am envisioning. For example, when I script a STRIPSHOW episode, I almost always provide rough thumbs. I think that’s because STRIPSHOW comics are so concise, they absolutely must convey everything contained in the scripts. But again, I always encourage artists drawing them to put their own spin on the art and approach the POVs in their own way.
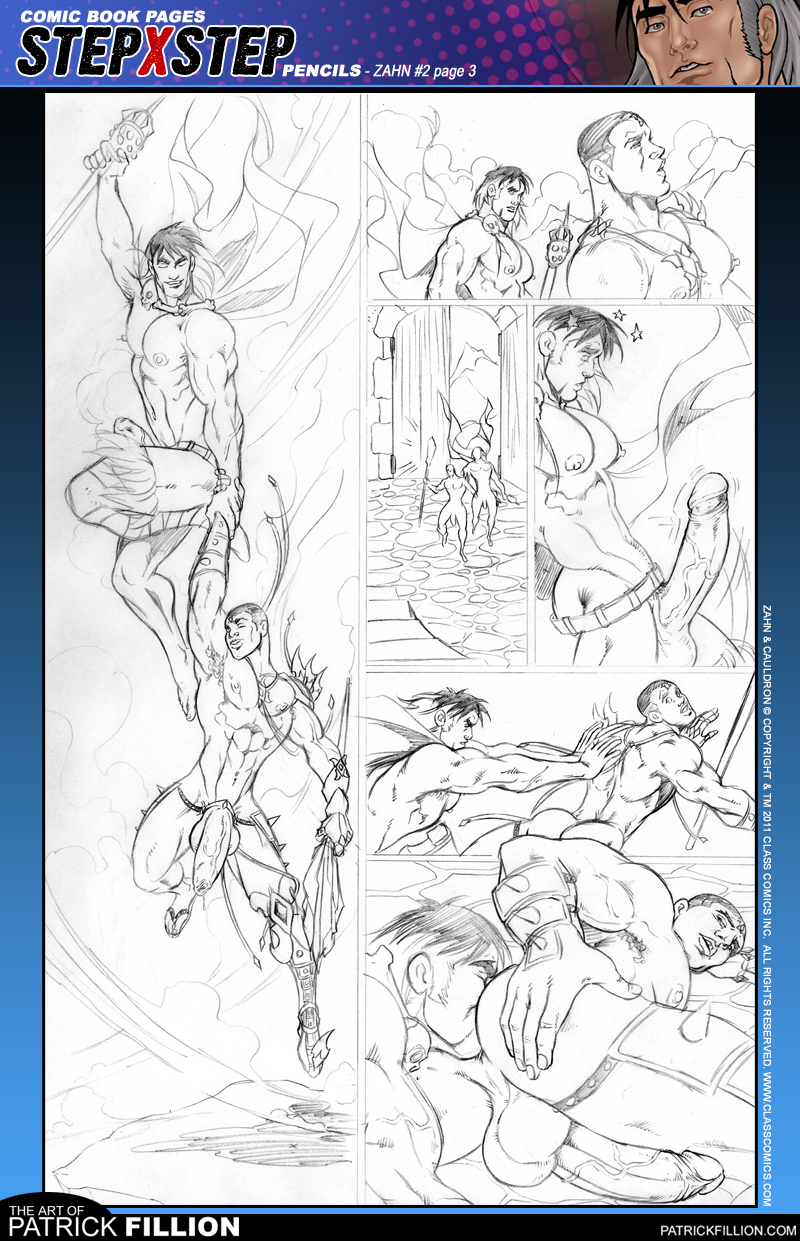
STEP #2 – THE PENCILS:
I love penciling. So much life, spontaneity and fluidity comes through in the pencils, and sometimes you can lose that a little in the inks. That’s why as a rule, I try to make high resolution scans of all my penciled art, since once it’s inked over, the pencils are gone for good.
To pencil, I use a PENTEL 120 A3dx 0.7 mm mechanical pencil. The lead is always sharp, not too dark and doesn’t smudge too badly. Also once I’m done, I find my pencils scan quite well. A PaperMate vinyl eraser is your friend, believe me! Don’t be afraid to erase and refine your pencils. Even if the majority of your pencils end up pretty loose, it’s still nice to have a good solid foundation of art to ink over.
My pencils can be really tight, or really loose. Since I ink my own work, and mostly because I have never found an inker to my satisfaction (I don’t mean to sound snotty here… I am just very particular and like really clean and smooth inks!) I often opt to put in the major details in the inks stage. The pencils then feel more like the “skeletons” of the final art, and the inks embellish, tighten and finalize.
For example, I almost NEVER pencil Cam’s stripes on his body. I always just ink them in. Once you’re comfortable with little tricks and shortcuts like this, you can save you a great deal of time in the penciling stage. And trust me… if you’re working on several projects at once, a few healthy shortcuts are a good thing… providing they do not adversely affect your art work!
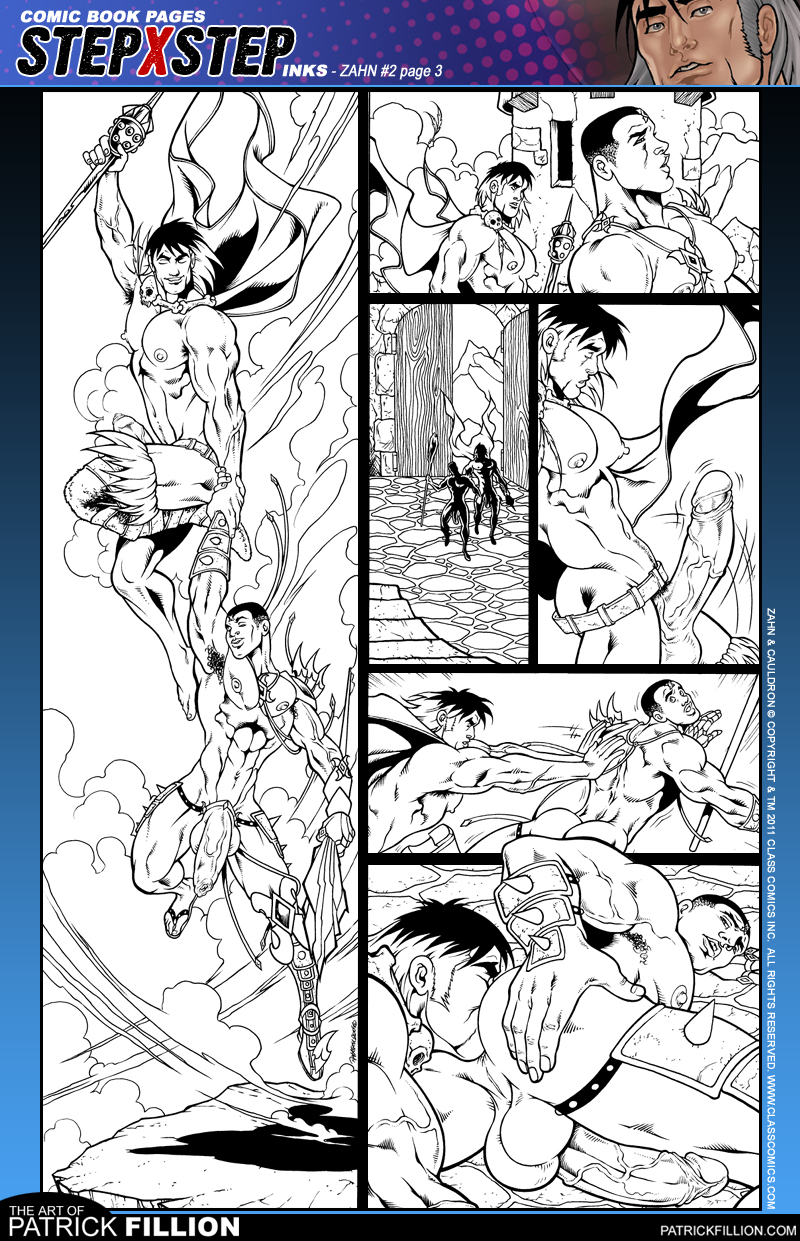
STEP #3 – THE INKS:
Inking is a necessity for me, given the sometimes looseness of my pencils. Today, you can find comics in which the art has not been inked, but colors have simply been added over top the pencils. It’s a very nice look, but I guess I’m just too old fashioned and set in my ways to do that on my stuff. Besides, inks can be a real joy!
I find it important to take breaks between panels. Inking is a very precise task, and I find my wrist, hand and arm can get very sore if I don’t break things up a bit. Plus, you need to take care of your back. Get up and stretch in between panels and shake out your hand a bit!
I don’t use brushes. I never have. I favor drafting pens like the Micron or Pigma series, mostly because they are so precise and handle very well. Believe it or not, Sharpies are great to fill in thick solids and shadows and stuff.
The inks on this page were fairly light, but because of this they had to be very precise and clean. You’ll also notice that I changed aspects of the second panel somewhere between the pencil and ink phase. I do that a lot actually. After I’ve penciled a page, I give it a long look-over and often, I’ll change a few things. In the case of this particular page, I felt it was important to add some tower elements in the background. This better sets the scene and helps the page make a bit more sense. It just flows better.
I love the look of the final inks. They seem more “comic book art” than any penciled of colored page to me for some reason. Maybe it’s because they are really the point where a project starts to come together. Either way, a finished inked page of sequential art always leaves me feeling very satisfied… like I’ve actually accomplished something in my day. I don’t get that when I pencil, because in my mind it is an unfinished stage. Inks can stand up on their own.
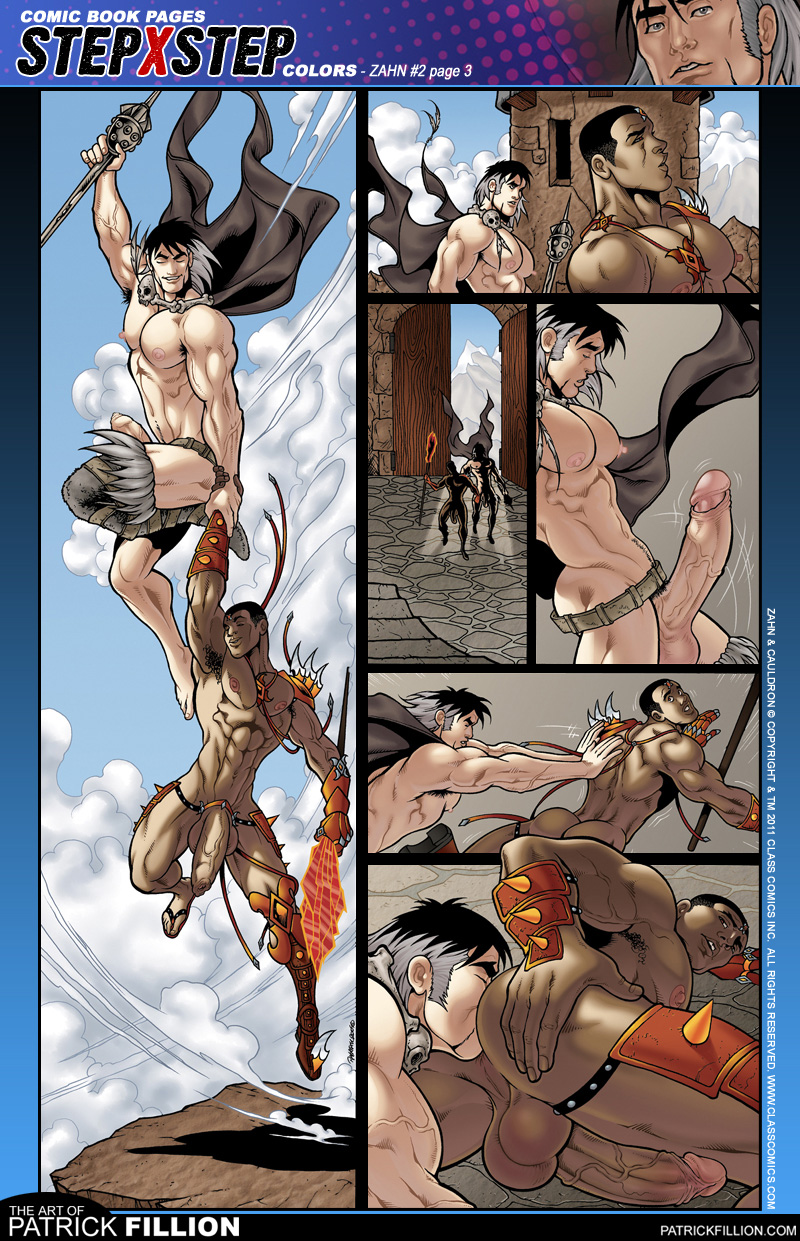
STEP #4 – THE COLORS:
I used to color a whole lot more stuff, but nowadays at Class Comics, there are so many projects going on at once, we’ve had to hire professional colorists to take some of the load off. It was a great move on our part I think, and we have been very lucky to find such talented folks to color for us.
This page was colored by Golden Key. When making color notes for the colorists, there are two things I try to insist on. The first is that the characters always be colored according to their official color palette, and the second that the pages flow and have good color continuity. I like to give only minimal direction, indicating if there is a precise light source in the scene, or if a character is wearing a garment of a specific color (although since most of my characters are usually naked, I don’t get to give directions on that very often! LOL!).
When I color something myself, I always use PhotoShop. It’s just an amazing program that has so many wonderful tools. I don’t really color stuff by hand anymore, as computer coloring is just so much more flexible and versatile. It’s really become the norm in the industry.
STEP #5 – LETTERING AND PRE-PRESS:
Once your page is fully colored, you are ready to finish it off.The lettering is done in Adobe Illustrator.
Once everything has been lettered, the comics are then laid out in InDesign, at which point they are ready to be handed over to the Printers.
So, when looking at a comic book, one can glance over a page pretty quickly, but it always amazes me just how much work and effort, not to mention LOVE that actually goes into creating it. Personally, I can think of nothing else on Earth that I would rather be doing.
Hope this has been a fun read, and maybe even helpful to you guys! See you again soon!
All the very best, Patrick XOXOX
Cool step by step Patrick. I really like the cute simple versions on the first page. The stars were a very nice touch as well. Always fun to see the process like this. Very good write up. This was very interesting to read and learn about what pencils and tools are best to use. I am sure many artists will read this and benefit from it. 🙂
Indeed, DP. These kinds of tutorials are invaluable.
I just love these explanations, they are so interesting and sometimes surprising.
I have to say I love your pencils, they are so clean ! I’m having such a hard time penciling I have to say, mine always end up so messy. But I see what you mean about the inking, some details “feel” better when you ink them directly. I’m amazed however that you use drafting pens instead of a brush, your lines are sometimes thick, sometimes very fine just like a brush. (I personally use a Pentel brushpen, beautiful as a brush and easy as a pen ! ^^)
Hiya Dinosaurprince…
Thanks a bunch, buddy! I’m really pleased you enjoyed this post and that you feel it was fun and informative. I’m hoping it’ll be of some use to new artists as well. You never know. LOL! 🙂 And I’m so glad you enjoyed the simple little thumbs… I actually really love the look of these things in general, even if they are almost always really crappy! It’s just really neat to see the idea of a page germinate from that into a completed piece!
Lotsa luv to ya!XOXOX
Patrick
Bonjour my dear Gâ-L…
I’m so glad you enjoyed my silly little tutorial! 🙂 Pencils can be really frustrating sometimes and I understand what you mean when you say that sometimes they end up looking a but messy. I personally find it’s best not to think about them too much when you’re doing them. I tend to over-analyze stuff at times and that results in a penciled page I’m not too pleased with. This may sound corny, but the penciling stage is really about channeling your energy onto the page. Let your hand glide over the paper and use it to pour onto the page what you have in your minds’ eye. Yeah, corny… but it works!
As for my inking tools, my secret is in varying the point of the pens I use. I find that alternating between a 08 and a 02 gives the best results… and I personally feel I have more control that way than with a brush. But you know, each artist has his or her own unique way of creating art… and I think it’s so cool that our methods all result in unique artistic imagery. I admire you for being able to use a Pentel brushpen so beautifully and so well. I was never able to get the hang of using those. Color me impressed, my dear! 🙂
BIG BIG Hugz + kisses,
Patrick XOXOX
Hiya G-Man…
I’m so glad you enjoyed this post and found it useful. That’s really rewarding to me! 🙂
Big Big Hugz + kisses to ya!
Patrick XOXOX
SOOOO HOT!!!
I’d love to see even a short video of you drawing.
Good tutorial, even non-erotic artists could benefit from this.
Love your work
Pat I couldn’t find the gold key program…are there others i can use?
Hi Preston…
Golden Key is not a program, he’s a colorist. He collab’d with me on this page! LOL! That’s why you can’t find a “Golden Key program”! 😉 Also, I never go by “Pat”! Just a friendly FYI!
Cheers,
Patrick XOXOX